
Having recently moved from a web shop to a new team that is much more focused on apps and devices, I want to familiarize myself with the tech we use so I can continue to make strategic product recommendations.
So I set a goal: zero-to-app-stores with something simple. But what?
Well, it’s not revolutionary, but I decided to make an interval timer for sets on my climbing hangboard. Regardless of other apps that may be available, the fitness app I already use does not do these well.

Humble beginnings: prototype-level design, packing-tape-as-phone-mount, and just training up a dead hang before moving onto more challenging holds. And I think it goes without saying that we’re not telling my landlord about this.
Actual Product Requirements:
- Conveniently run on a mobile device I own
- Audio and visual cues to progress through a circuit
- Able to handle the weird nested patterns of sets I’m seeing, like:
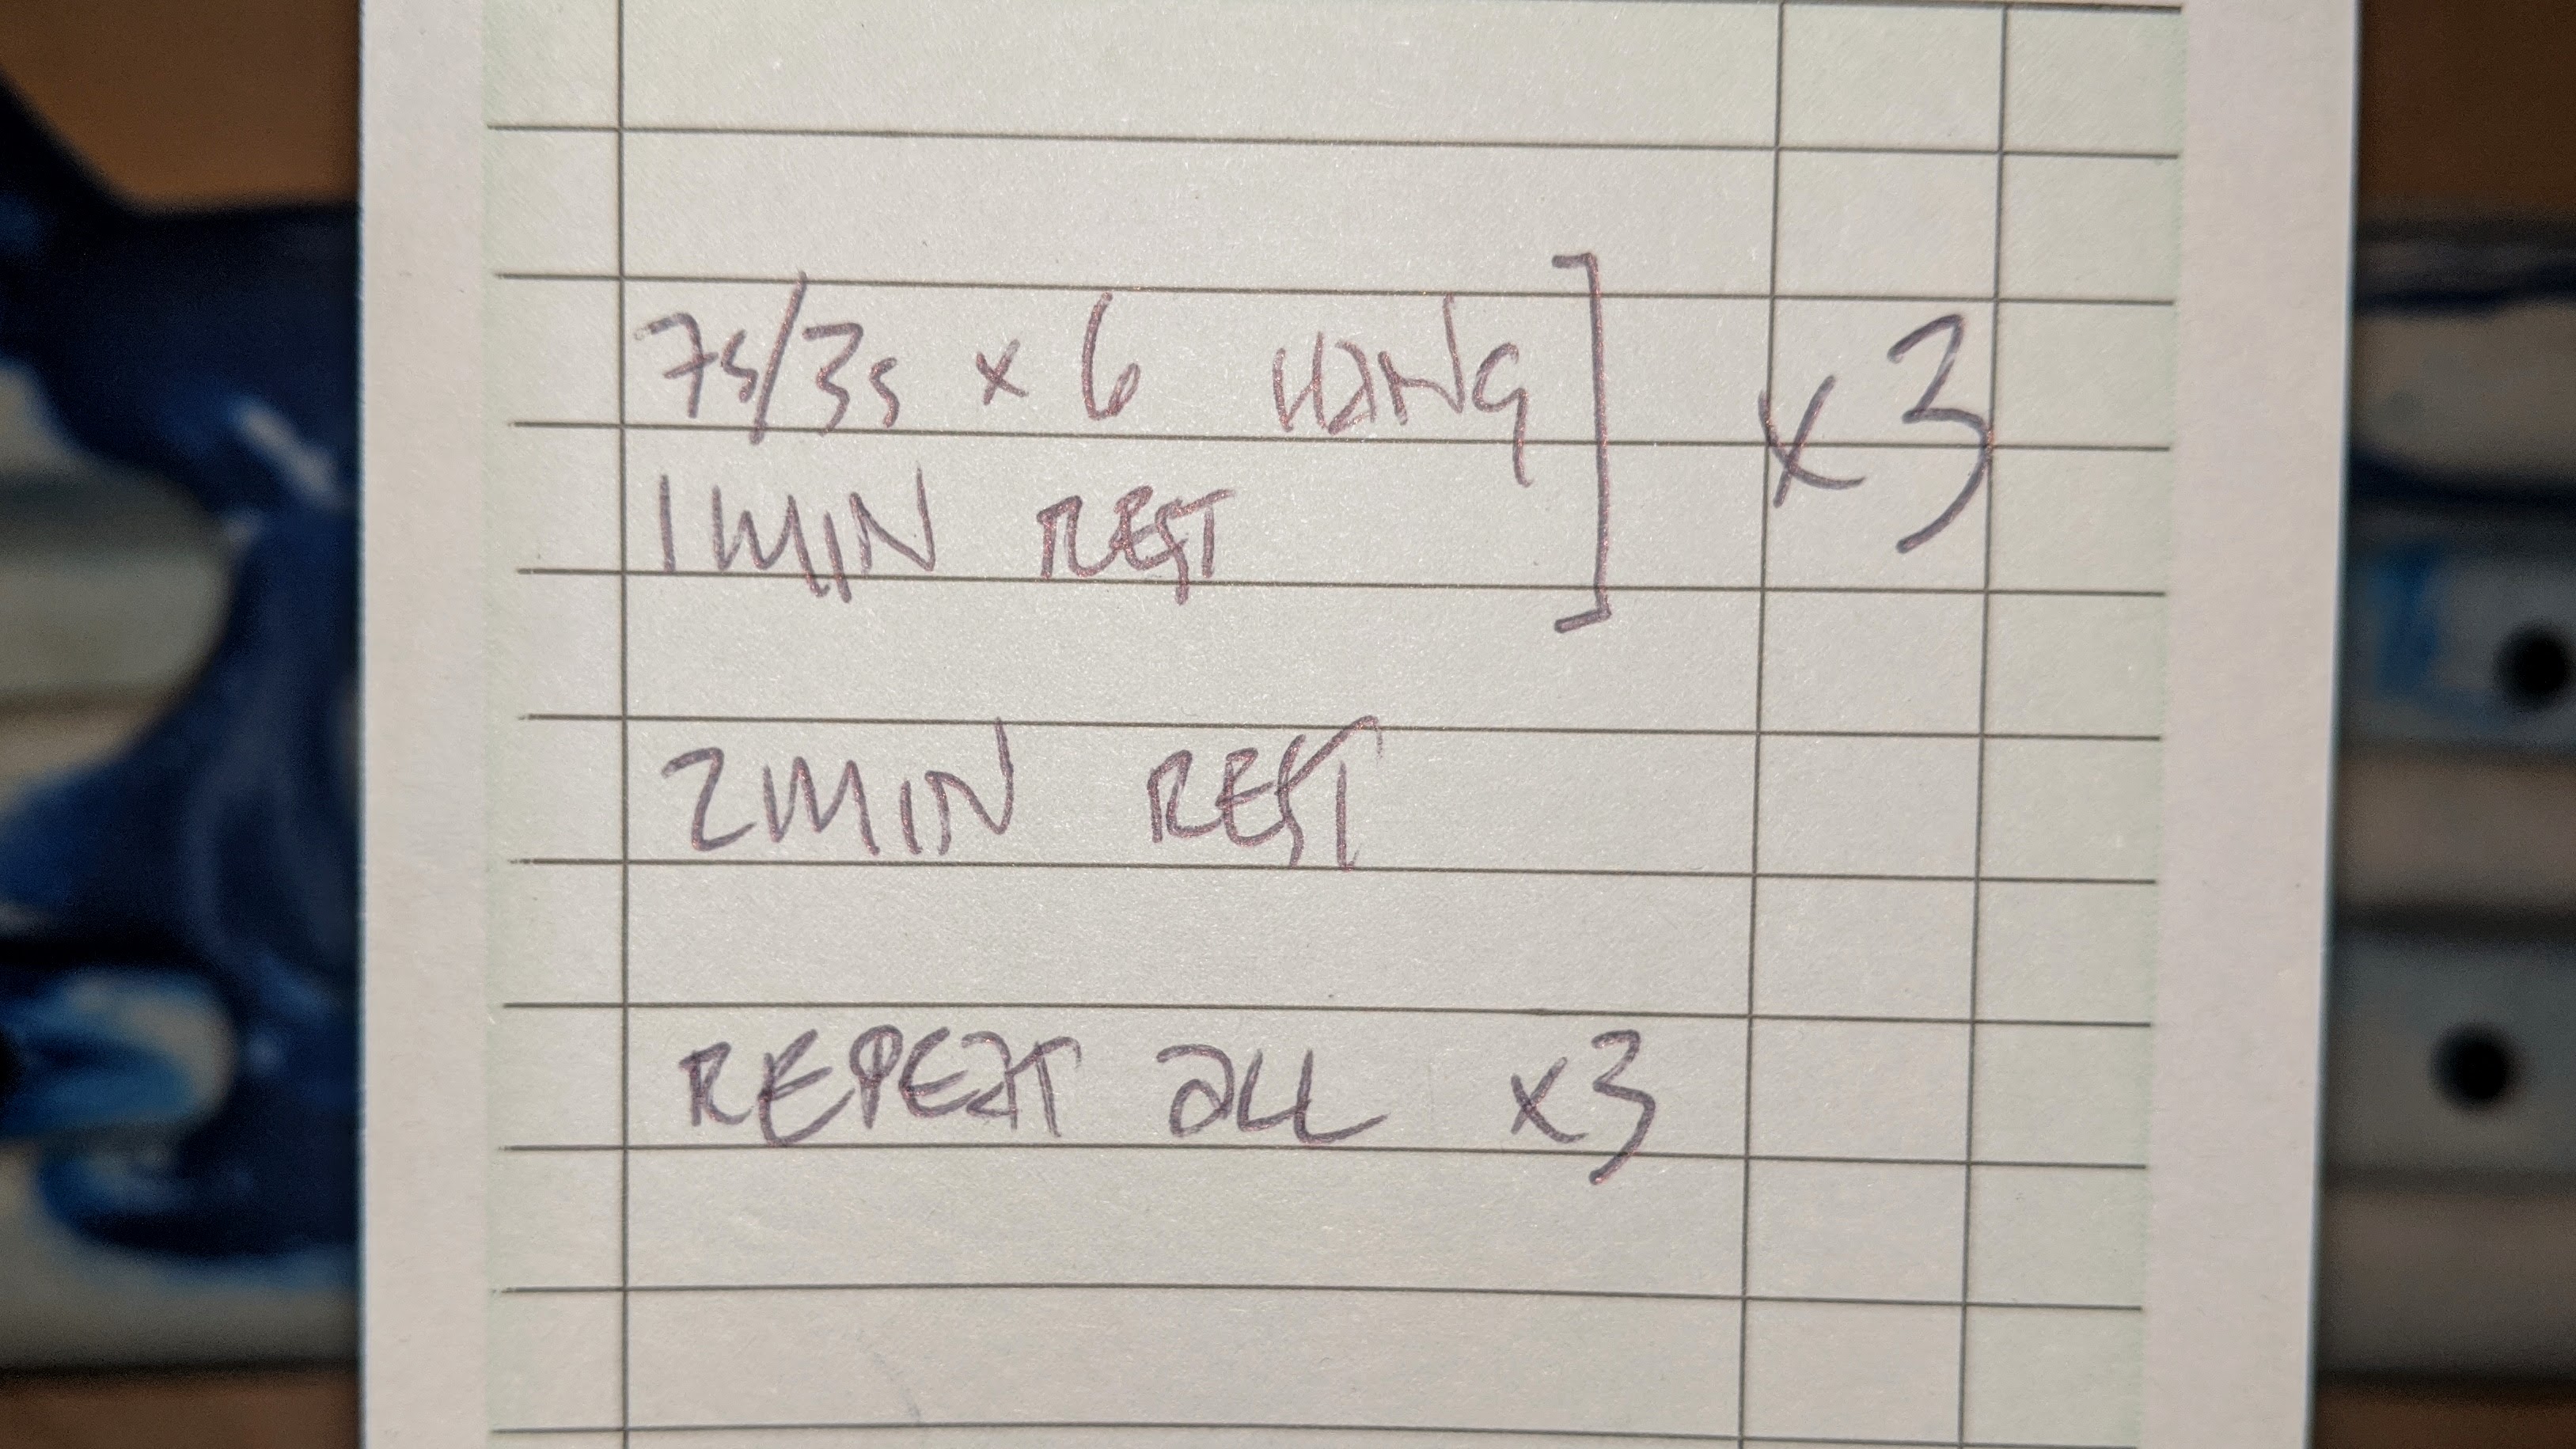
Unlike common “work” vs “rest” timers that repeat, these sets have weird patterns that are hard to set timers for or count off in my head.
Professional Development Requirements Goals
- Mobile app, built on a common stack and something Very is currently using
- Cross-platform
Already knowing some JavaScript, I opted for React Native. I haven’t used React on the web (yet) but it’s hugely popular so learning it will be useful. Also, we’ve increasingly seen clients opt for React Native over platform-specific codebases. For many applications, maintaining one central JS codebase that leverages bindings to native libraries and elements is both easier to hire for and less expensive to maintain than entirely disparate codebases.
Getting Started and Expo
The first page of React Native’s “Setting up the development environment” tutorial directs new developers to Expo for a quick start.
Expo offers a ready-to-use bundling of tools and services with a baseline set of packages/components. Its local scripts and its SaaS platform handle all the bundling and building; no Android Studio or Xcode. Perfect for the “Hello World phase.”
// DO NOT COPY THIS! This is learning scratchwork, not best practices patterns.

import React, { Component } from 'react';
import { Text, View } from 'react-native';

export default class HelloHangboard extends Component {
  render() {
    return (
      <View style={{flex: 1, justifyContent: "center", alignItems: "center"}}>
        <Text style={{textAlign: "center", fontSize: 32}}>Hello, Hangboard.</Text>
        <Text style={{textAlign: "center"}}>
          I'm stuck in my apartment because of coronavirus.
        </Text>
      </View>
    );
  }
}
Observations on Expo: Expo offers so much “for free.” It’s also upfront about the limitations. This was a fantastic way to start, limiting the number of new things I had to learn simultaneously. (Limit the WIP, yo!) But I started running into trouble with sounds. Also, compiled binaries, which came from Expo’s SaaS platform, were large.
Observations on component building: As an industry, we spent a long time highlighting the wisdom of separating concerns into separate files: HTML for content, CSS for appearance, and JS for interactive function. Bringing CSS into JS (and the multitude of conflicting practices for doing so) and using JSX templating for HTML/Content-in-JS both felt very odd, but I will learn. And I get it now: that was (and still is, to a certain extent) for webpage building, which this isn’t — this is application scaffolding. So I can see the argument for a consolidation of “UI, appearance, behavior” and opting for separation of feature as more sustainable. Hell, that’s how I write a backlog.
An immediate plus, though: UI layout with Flexbox is pretty fantastic.
// DO NOT COPY THIS! This is learning scratchwork, not best practices patterns.

import * as React from 'react';
import { View, Text, StyleSheet } from 'react-native';
import { AntDesign } from '@expo/vector-icons';

import Title from './Title';
import Link from './Link';

export default class About extends React.Component {
  constructor(props) {
    super(props);
  }

  _exit = () => {
    this.props.navigation.navigate('Welcome');
  }

  render = () => {
    return (
      <View style={aboutStyles.container}>
        <View style={aboutStyles.main}>
          <AntDesign style={aboutStyles.closeButton} name='closecircleo'
            size={32} color='black' onPress={this._exit} />
          <Title small />
          <Text style={aboutStyles.paragraph}>Sources:</Text>
          <Link icon='link' title="REI's post “Hangboard Training 101”"
            href='https://www.rei.com/blog/climb/hangboard-training-101'></Link>
          <Link icon='link' title="Metolious Training Guide"
            href='https://www.metoliusclimbing.com/training-guide-overview.html'></Link>
          <Text style={aboutStyles.paragraph}>With special thanks to Joe and Jay.</Text>
          <View style={aboutStyles.warningContainer}>
            <Text style={[aboutStyles.warningText, aboutStyles.paragraph]}>
              Improper use of a hangboard can cause serious finger and tendon
              injury; don't strain to complete a set and do not train to the
              failure point. Improper installation can cause a serious fall.
              Refer to manufacturer setup and usage instructions as well as an
              experienced trainer before use.
            </Text>
          </View>
          <Link icon='hearto' title='Created by TSmith'
            href='https://tsmith.com' color='#CC0066'></Link>
        </View>
      </View>
    );
  }
}

const aboutStyles = StyleSheet.create({
  container: {
    flex: 1,
    justifyContent: 'center',
    alignItems: 'center',
    backgroundColor: '#333333',
    padding: 16,
  },

  main: {
    alignItems: 'stretch',
    padding: 16,
    backgroundColor: '#FFFFFF',
    borderRadius: 8,
    elevation: 4,
  },

  closeButton: {
    position: 'absolute',
    top: 16,
    right: 16,
    zIndex: 10,
  },

  paragraph: {
    marginTop: 8,
    marginBottom: 8,
  },
  // [...]
};
Leaving Expo
I “ejected” my app from Expo for a few reasons:
- iOS wouldn’t rapidly seek/replay Expo AV
Audioobjects, even though it worked fine on Android. - Expo includes a bloat that I wasn’t using.
- I wanted to manage iOS and Android builds myself to learn how, then involve our CI/CD provider.
- I could still use Expo packages as part of a “bare workflow” project.
Running expo eject
was straightforward. Expo’s scripts generate the android and ios folders
and set them both up with build scripts and config.
Observations:
- Expo Eject left in React Native Unimodules, which accounts for a lot of the bloat. Removing it will require editing platform-specific code, though.
- Eject did not produce a good
.gitignorefor the platform-specific builds, so I ended up with a few things in version control that I have since learned should be downloaded or generated.
Development Environments
Normally, I build on Linux. I wanted to give Windows development a shot since it is easier to connect my phone to my PC than a Linux VM/container.
React Native’s environment docs are great. I got Windows (for Android) and macOS (for iOS and Android) set up quickly.
Observations:
Mac Stuff:
- As with Linux, I’m using
nvmto install and manage Node versions on my Mac, rather than using Homebrew.
Windows Stuff:
- Microsoft’s tutorial “Set up your Node.js development environment directly on Windows” made this really easy.
- Git for Windows (as in the canonical git package,)
is in a much better place since last I checked.
- However, it provides — what I think — is poor help text and
default for config
core.autocrlf. The default value istrue, which setsCRLF(OS-native) line endings on all text files on checkout and always commitsLFendings into the repo. I have always written source files withLFendings only, even on Windows. Setting that config toinputwill leave files as-is in the working tree. Files will commit withLFendings, and new files checked out will come out as they’re committed.
- However, it provides — what I think — is poor help text and
default for config
- nvm-windows
works well, but it does not appear to read
.nvmrcfiles correctly? - On Windows, all of this works better in PowerShell than Command prompt or Cygwin Bash. I am not currently using WSL.
- I had to edit the environment variable config for Android Studio.
Specifically, the
PATHadditions for Windows weren’t right in React Native’s environment tutorials. Watch where Android Studio installs itself, its SDKs, and the Platform Tools.
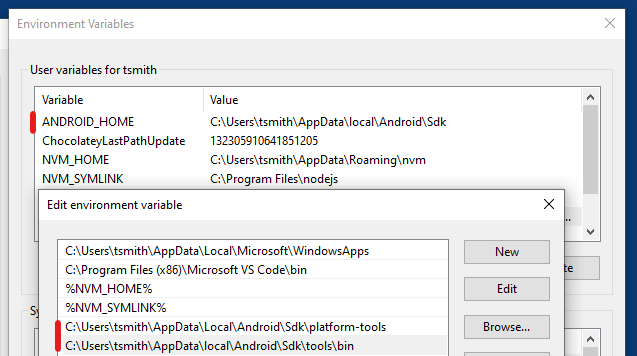
On Windows, Android Studio installed itself and the Android SDKs/tools in %LOCALAPPADATA%, not the drive root.
→  cat ~/.bash_profile | tail -n 5
export ANDROID_HOME=$HOME/Library/Android/sdk
export PATH=$PATH:$ANDROID_HOME/emulator
export PATH=$PATH:$ANDROID_HOME/tools
export PATH=$PATH:$ANDROID_HOME/tools/bin
export PATH=$PATH:$ANDROID_HOME/platform-tools
On Mac, Android Studio is in my local user’s Library — consistent with RN’s docs.
Building Release Packages
Next, building installable packages. That wasn’t bad. Initially, I wasn’t sure
the names for “app version that wants to connect to the JS bundler service”
(debug) versus “app version that is packaged and ready to use on your phone
now” (release).
The “Running on Device” tutorial explains how to build both, but there are enough foundational steps explained concurrently that it feels clearer in retrospect having done it.
iOS:
# Debug
→ npx react-native run-android
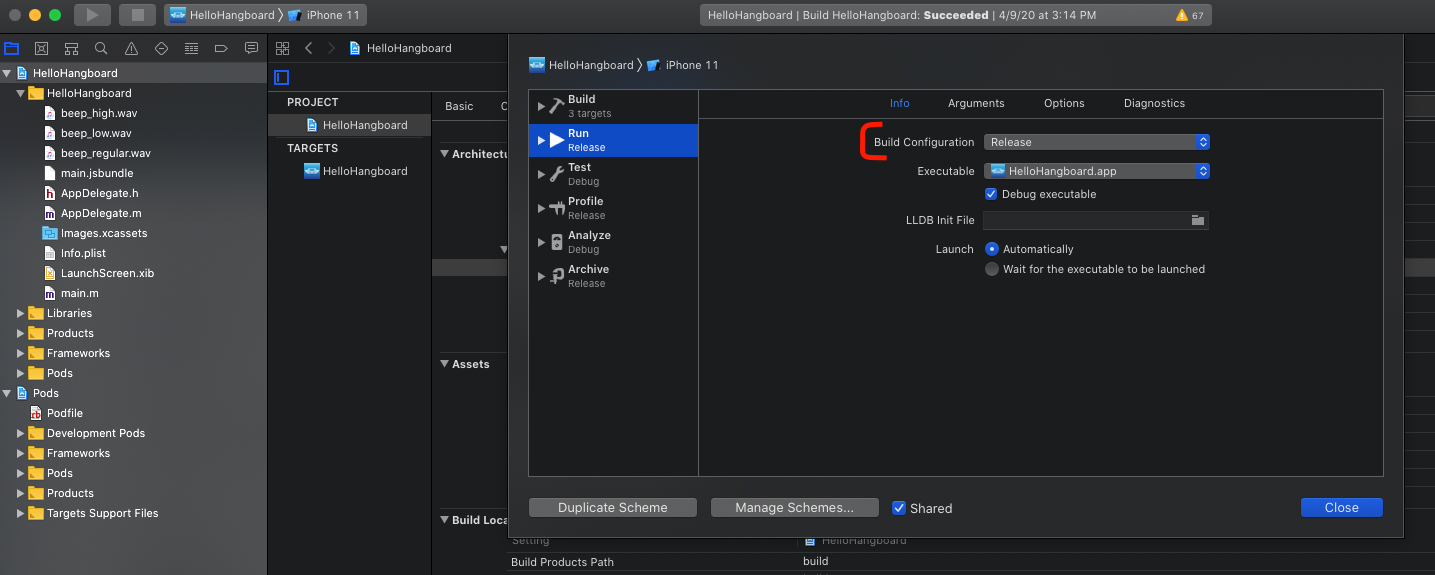
For Release: In the Project menu in Xcode, select “Edit Schemes” to change the build config, then Build the project.
Android:
# Debug
PS> npx react-native run-android

# Release
PS> .\gradlew assembleRelease
I ran into a conflict between React Native 0.61.4 and Android’s SDK 29. The
connection from the debug release back to the Metro JS bundler is insecure,
which the upgraded Android SDK disallows by default. This broke debug builds
on both platforms. Tom at Stack Overflow
offered a Manifest to disable this for debug builds only, which fixed it.
<!-- HelloHangboard/android/app/src/debug/AndroidManifest.xml -->
<?xml version="1.0" encoding="utf-8"?>
<manifest xmlns:android="http://schemas.android.com/apk/res/android"
    xmlns:tools="http://schemas.android.com/tools">
    <uses-permission android:name="android.permission.SYSTEM_ALERT_WINDOW"/>
    <application android:usesCleartextTraffic="true"
      tools:targetApi="28" tools:ignore="GoogleAppIndexingWarning" />
</manifest>
And there it is!
Building with CI/CD
Next, I wanted to get Bitrise, one of our CI/CD
platforms, building cross-platform for commits to master.
That was fairly straightforward except for code signing, which caused issues building locally, too, but quickly became a showstopper:
- Code Signing for Android is a moderate annoyance, but producing and using a key locally is well documented, and all you have to do is just keep using it. Uploading that key to Bitrise was easy, but I had to add the signing step to the workflow.
- Code Signing for iOS is (currently, to me) profoundly difficult to untangle if you run into a problem. Xcode seems to imply that it can all be done within the application, but no cert I provisioned within Xcode’s Preferences would work with Very’s Team (nor my “Personal Team” either). And once I got it on Bitrise, I started having Provisioning Profile problems on top of that. All despite supposed options for these things to be handled automatically.

When I threw it all out and started over outside Xcode, it worked fine, first try:
- Access our corporate Apple Developer Account online.
- Create a Bundle ID for HelloHangboard (
com.verypossible.hellohangboard) specifically. - From the Apple Developer website (not locally in Xcode), create a Distribution certificate to use for my name within Very’s org.
- Again, from the Apple Developer website, create a Provisioning Profile matching: that cert, intended for Apple Distribution, on that Bundle.
- Downloading and importing those things into Xcode, then uploading to Bitrise.
- Using Bitrise’s codesigndoc tool to pull these from Xcode automatically would have been simple had the certs worked. But they didn’t.
Clearly, iOS Code Signing is the part of this I had the most trouble with, and need to study more about. I felt like it should be simple and that I knew what was going on — it just kept not working, even though all the IDs matched every time.
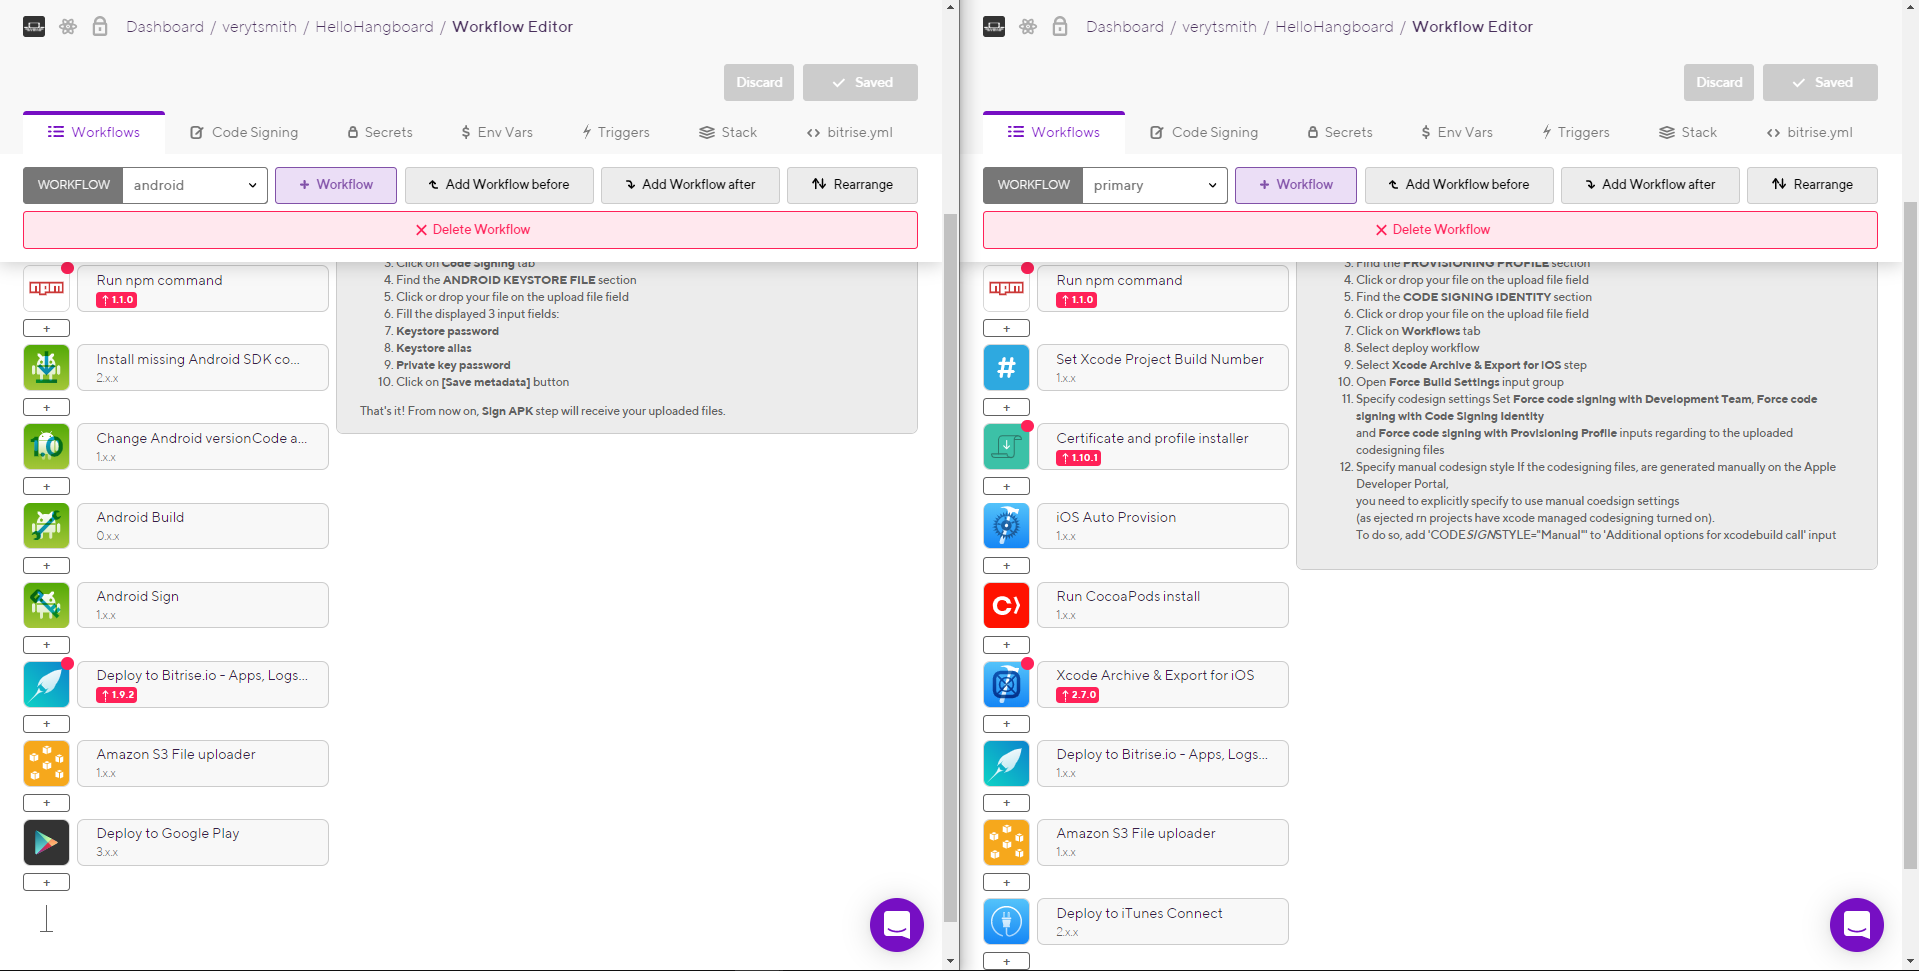
Once that was cleared up, the Bitrise workflow config was not difficult. In separate workflows for iOS and Android, I have these basic steps:
- Load SSH key for the repo and clone it
npm install- (iOS) Auto Provision (pulls in and confirms the cert and provisioning profile)
- Install either Android components/modules and iOS CocoaPods
- Override/increment the project version and build code based on the Bitrise build number
- Build
- (Android) Sign, which happens post-compile, with the key I made locally.
- Save binaries to Bitrise and my S3 backup bucket
- Upload directly to App Store Connect and Google Play Console
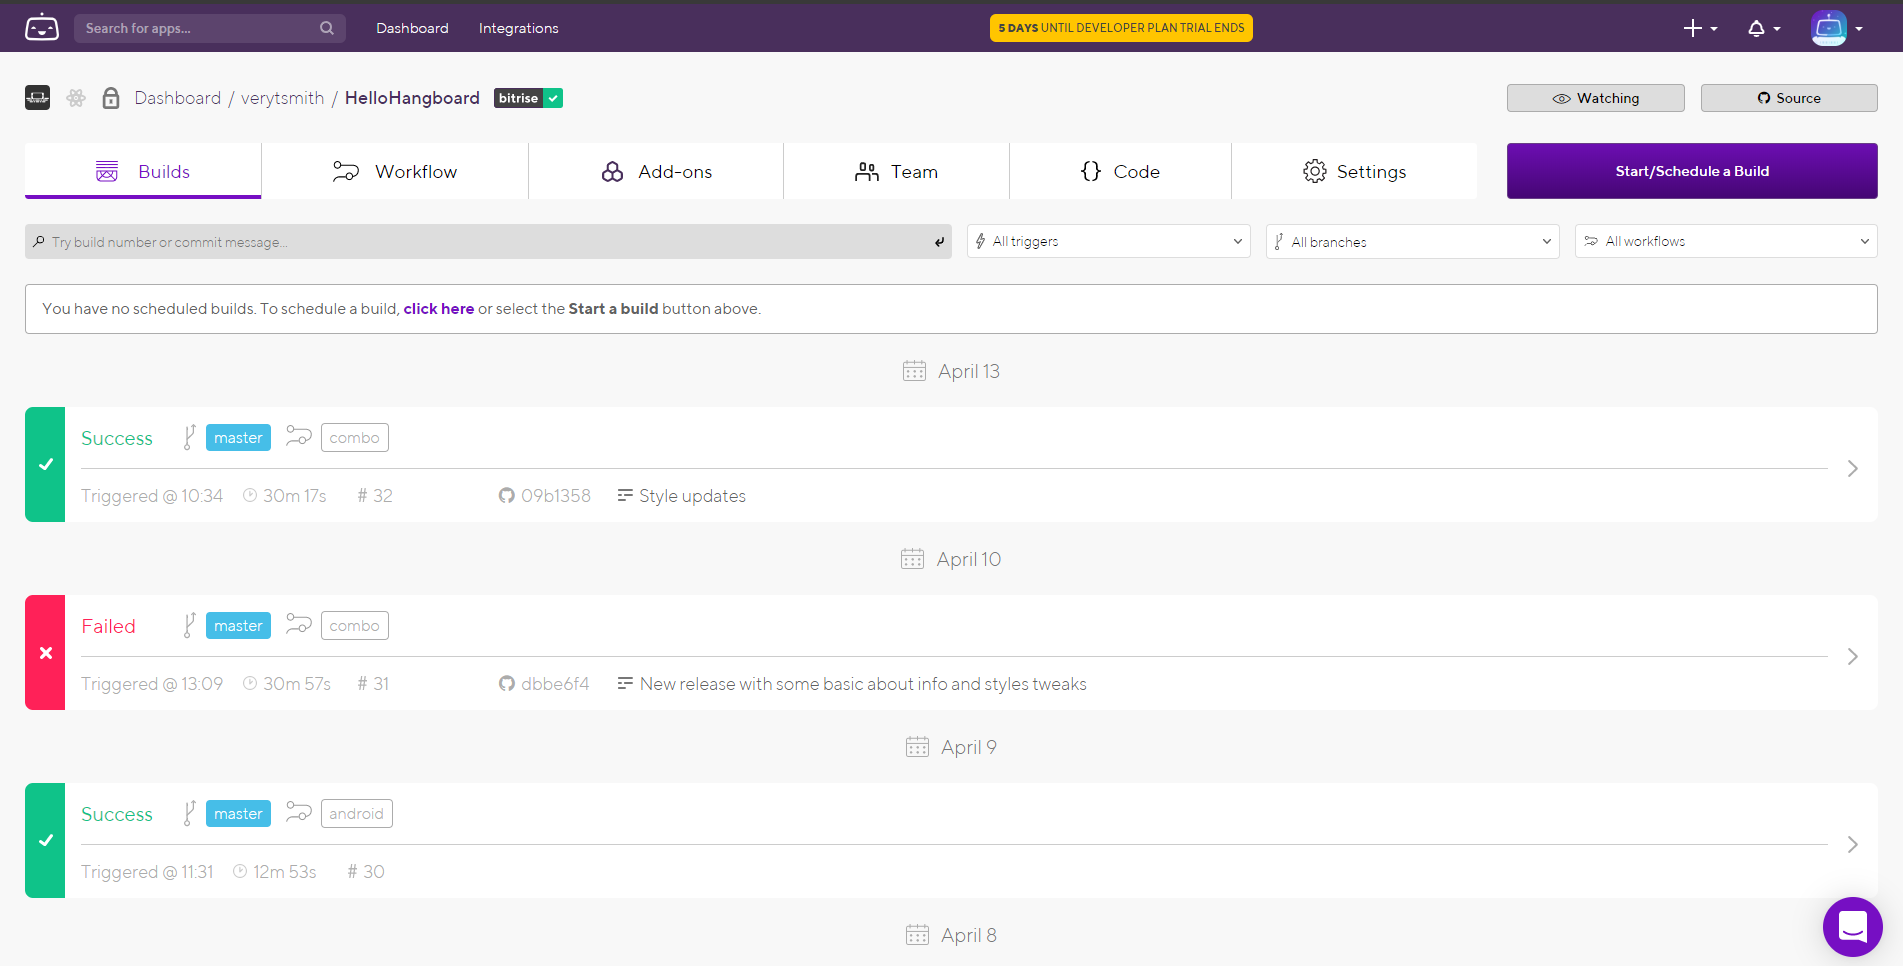
With workflow triggers, any commit on master will run ios and android
workflows sequentially. Once uploaded, they can be easily released to testers.
Or so I thought.
App Store Connect and Google Play Console
If Android’s Code Signing was an easy hoop to jump through, it was Apple’s chance to sign when getting into App Store Connect.
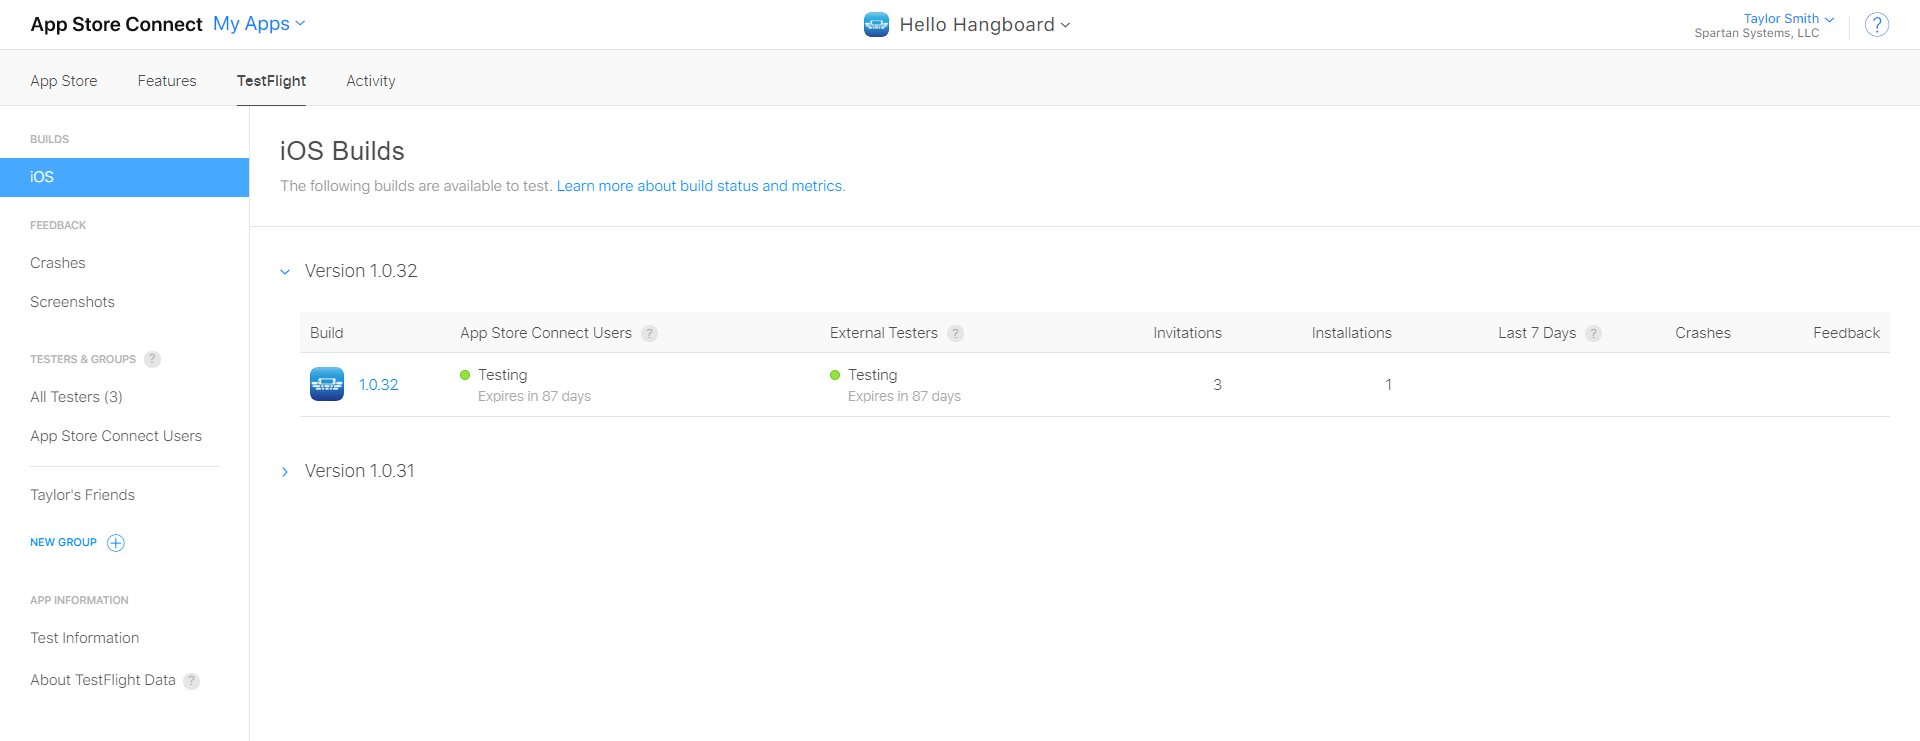
I had a Beta Reviewed app on TestFlight and working on my iPhone (and Dad’s!) within 48 hours.
Google Play Console, on the other hand, has a rather opaque approach to letting me know how long I will be “pending.”
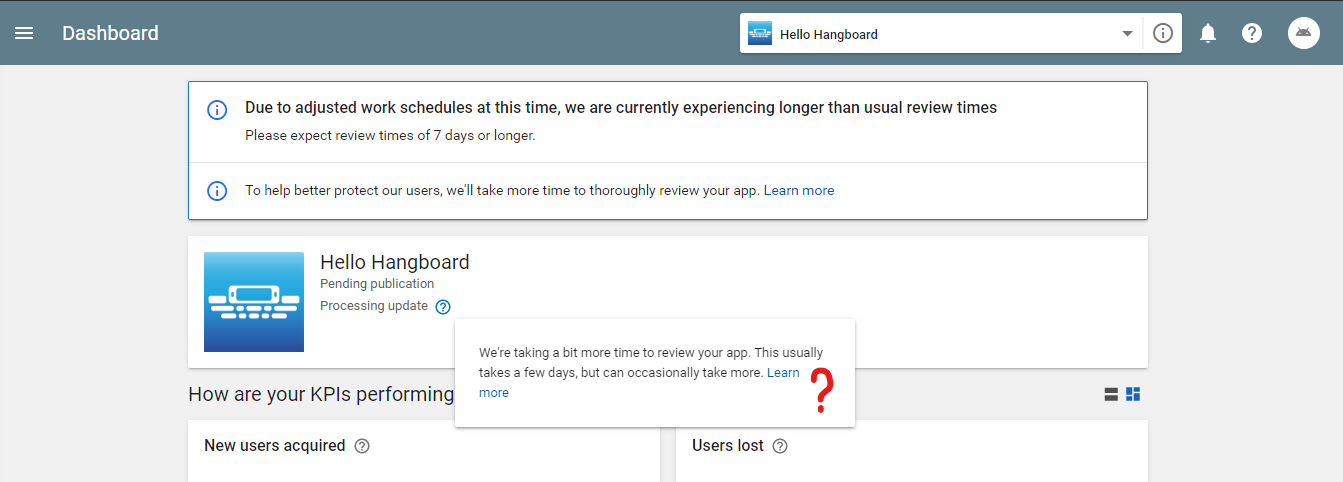
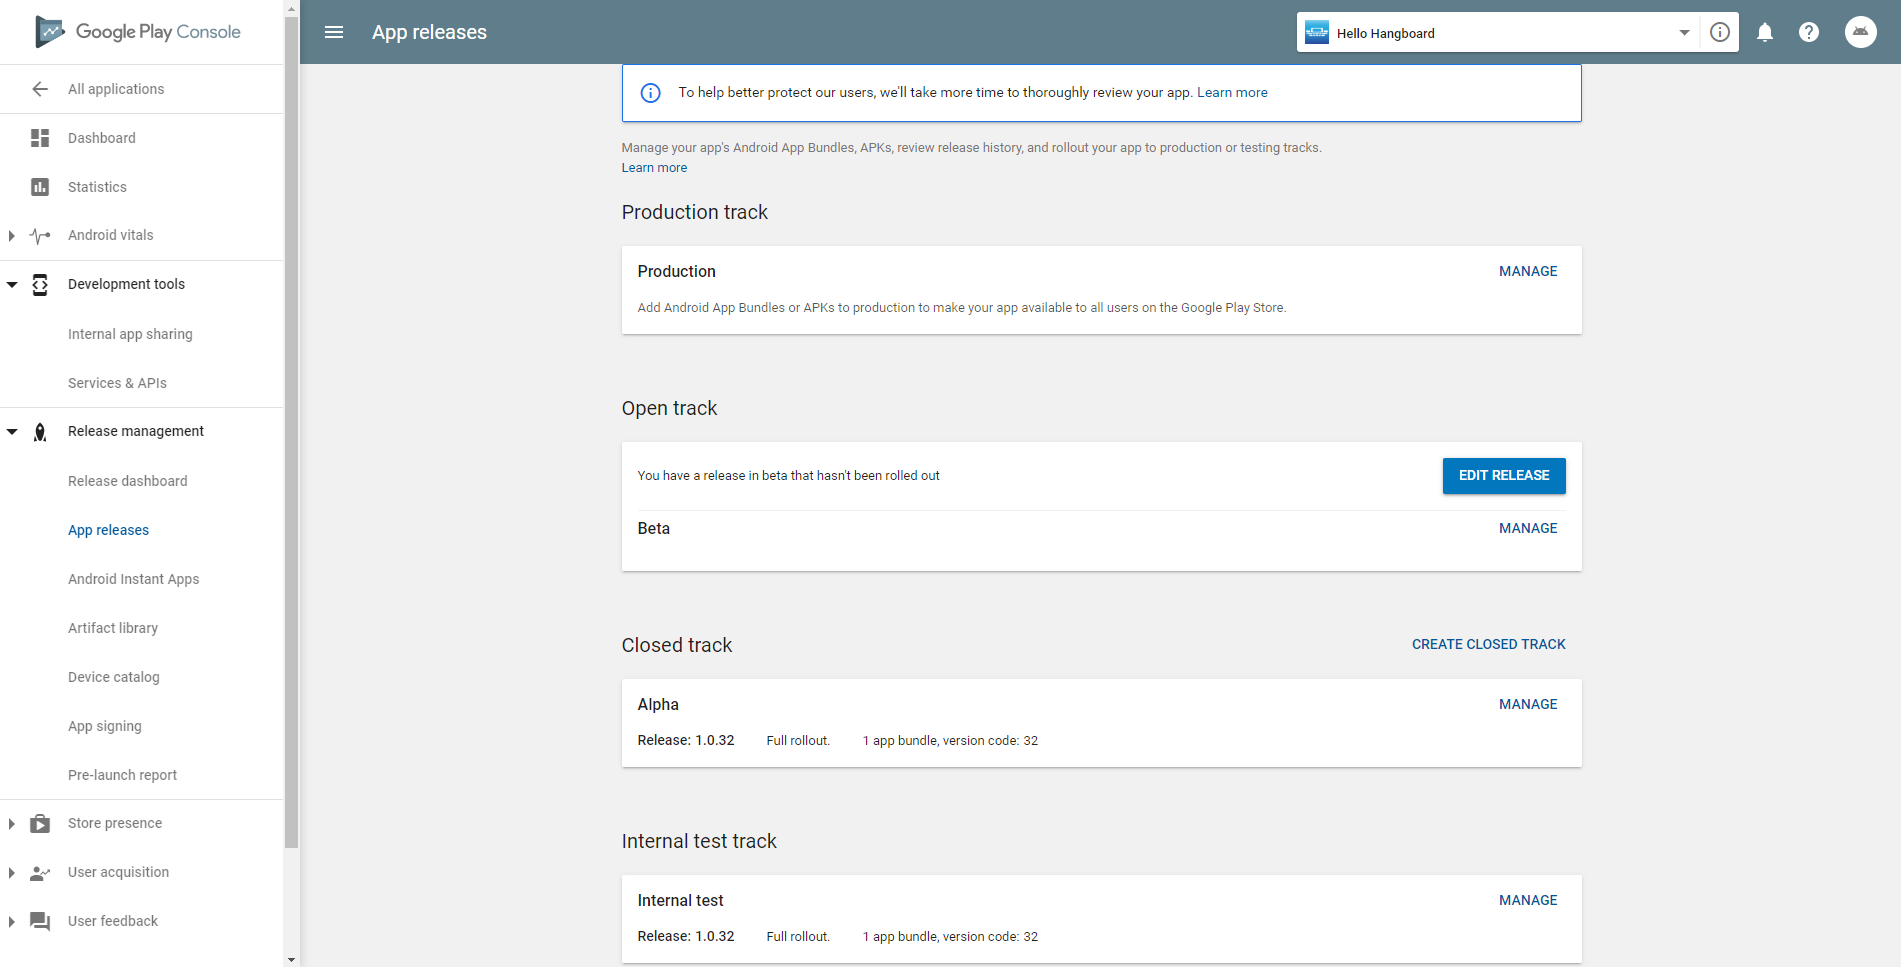
I do like how Play Console offers more robust release tracks for Internal, (Closed) Alpha, (Open) Beta, and Production releases, but makes it very difficult to understand what part you’re waiting on. At present, I have the 1.0.32 release “fully rolled out” (their words) in the Internal and closed Alpha.
But I can’t get a link or an email invite to share, nor can I even get it installed on my own device registered with this account. Thankfully side-loading apps in Android is easy, so I’ve just done that and moved on with life.
Certainly, I understand slower processing from any business in this time, but it has been well over a week. I am happy to wait! However, what is not obvious from this console or any help docs is: are they waiting on me? Or I am waiting on something from them? And this isn’t an uncommon question outside “coronatime” either.
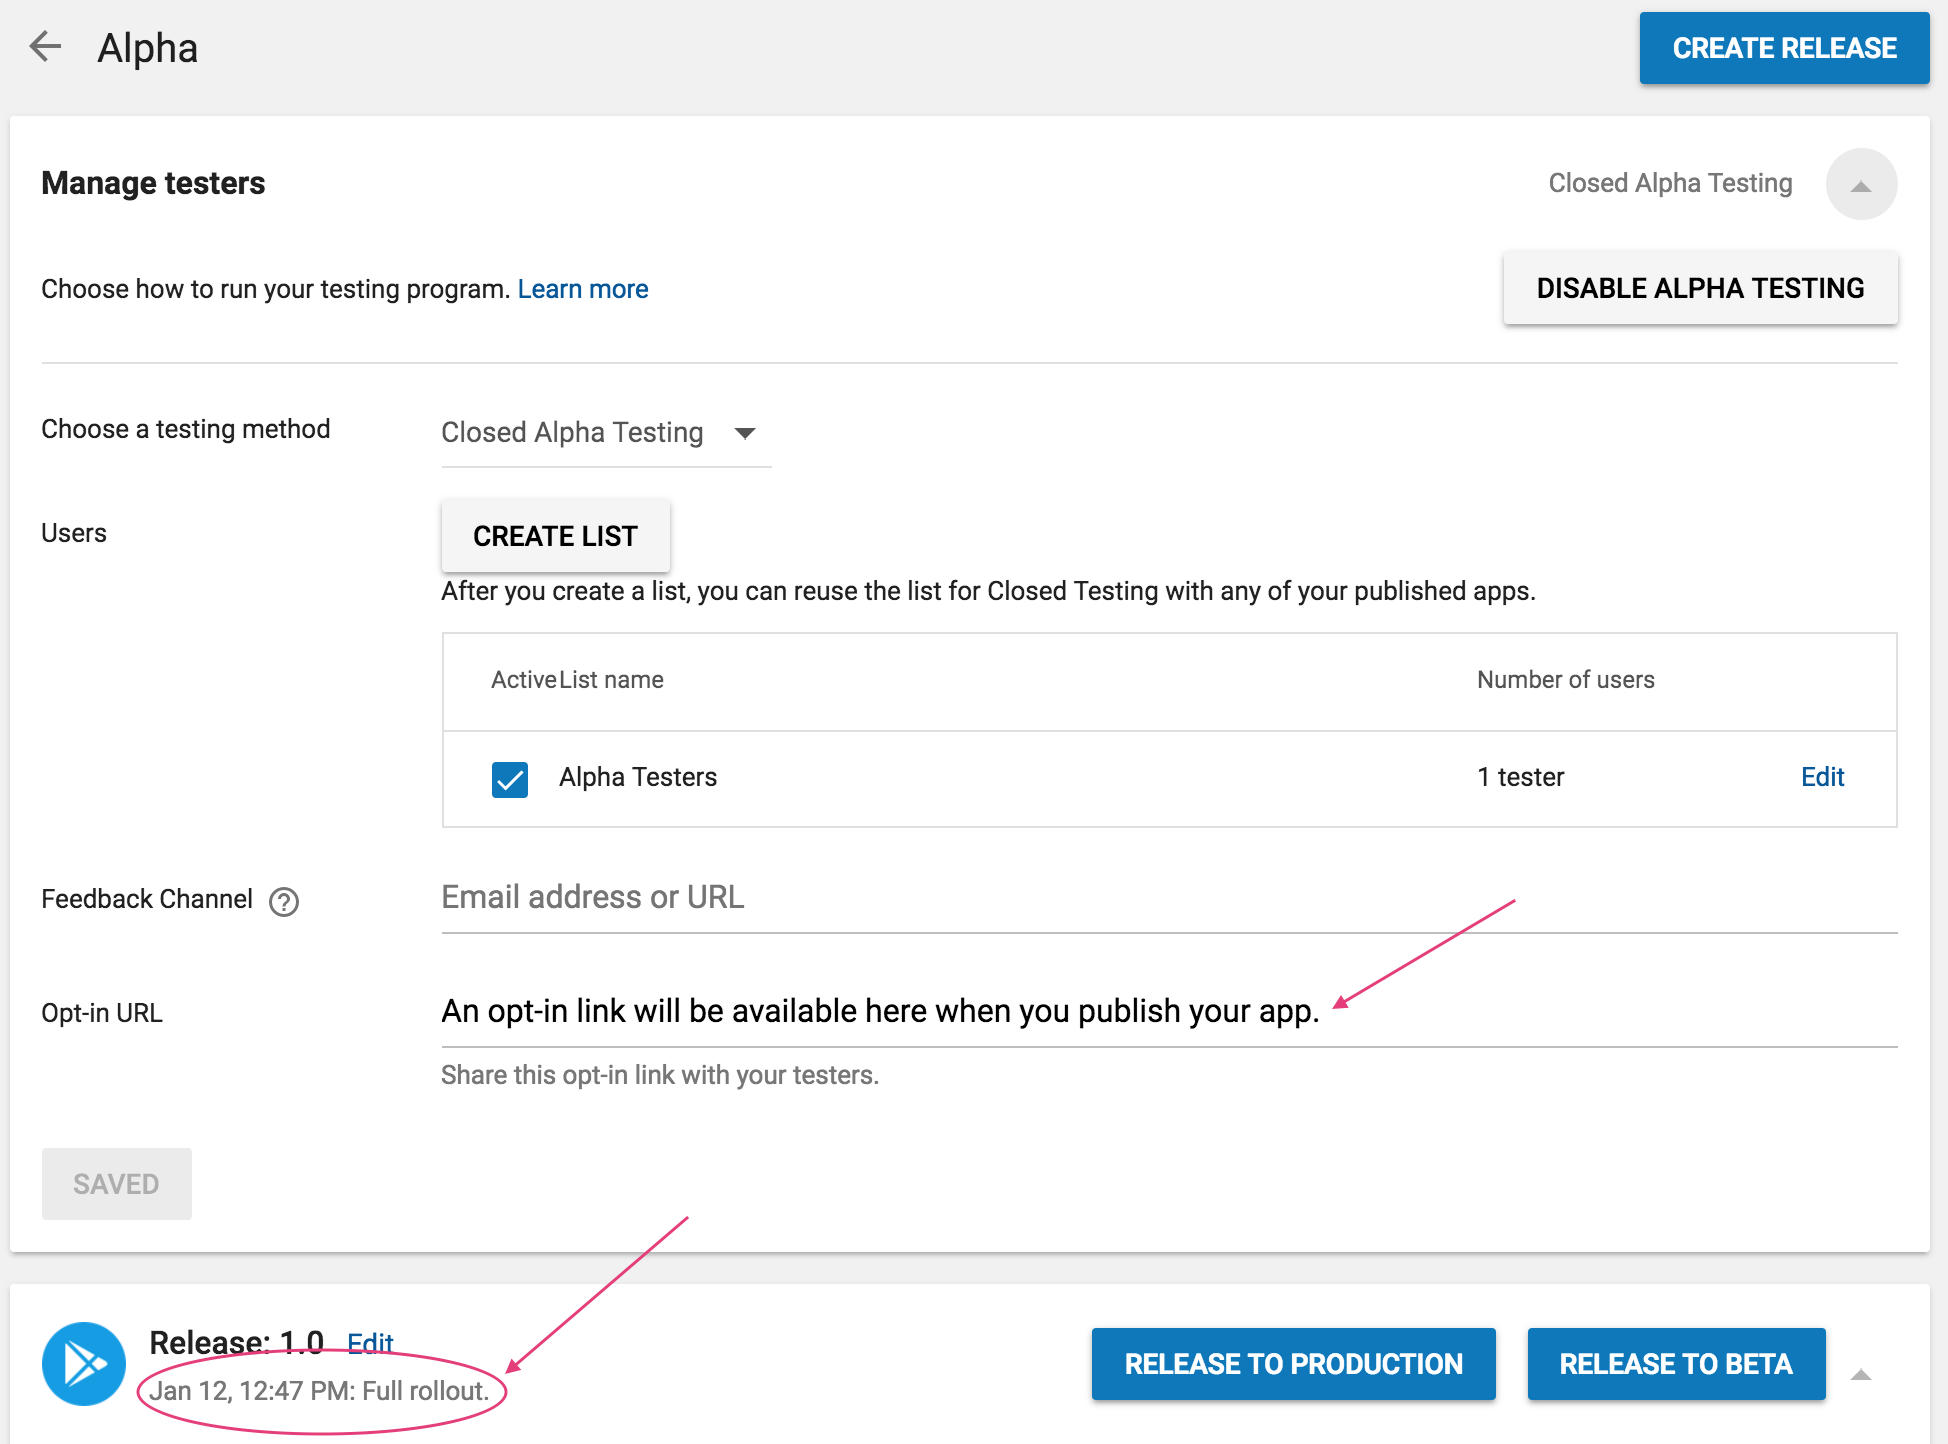
This screenshot, from StackOverflow, is what I see too. It feels like conflicting language: “Released, full roll-out” versus “No link or email invites until you publish.”
Community responses vary between “it’s just a matter of time, you have to wait” to “click X magic button in Y console page,” but none of Google’s official documentation clarify how one should resolve what feels like a stall.
I did not realize that getting a Closed Alpha on Google Play would involve Google reviewing not only the app, but also the store description. In a first draft, I used the word “coronavirus” — in a subsequent draft, I removed that but referenced “stay-at-home orders” instead — as a reason someone might want to try training on a hangboard at home. I don’t know which version they read, because you can’t peg drafts of the store listing to releases in the app. But whichever it was, they did not like it.
Google was putting any app mentioning the current situation through extra scrutiny, and rightly so. But I wish I had known that my draft description was going up for review, too, even for an invite-only release. Turns out, on review, Google suspended my Play Console account (like, can’t log in anymore suspended). I had to appeal this decision, promising to rewrite the description. Thankfully, there was no objectionable content in the app itself, so that made for an easier plea. My account was reinstated and I was able to submit a new version with a new description shortly thereafter.
So, my bad, but my critique on the opacity of this process in the UI stands.
Recap and Roadmap
That was fun. Having little to do most evenings made it happen faster…
What I’ve built meets my MVP objectives for:
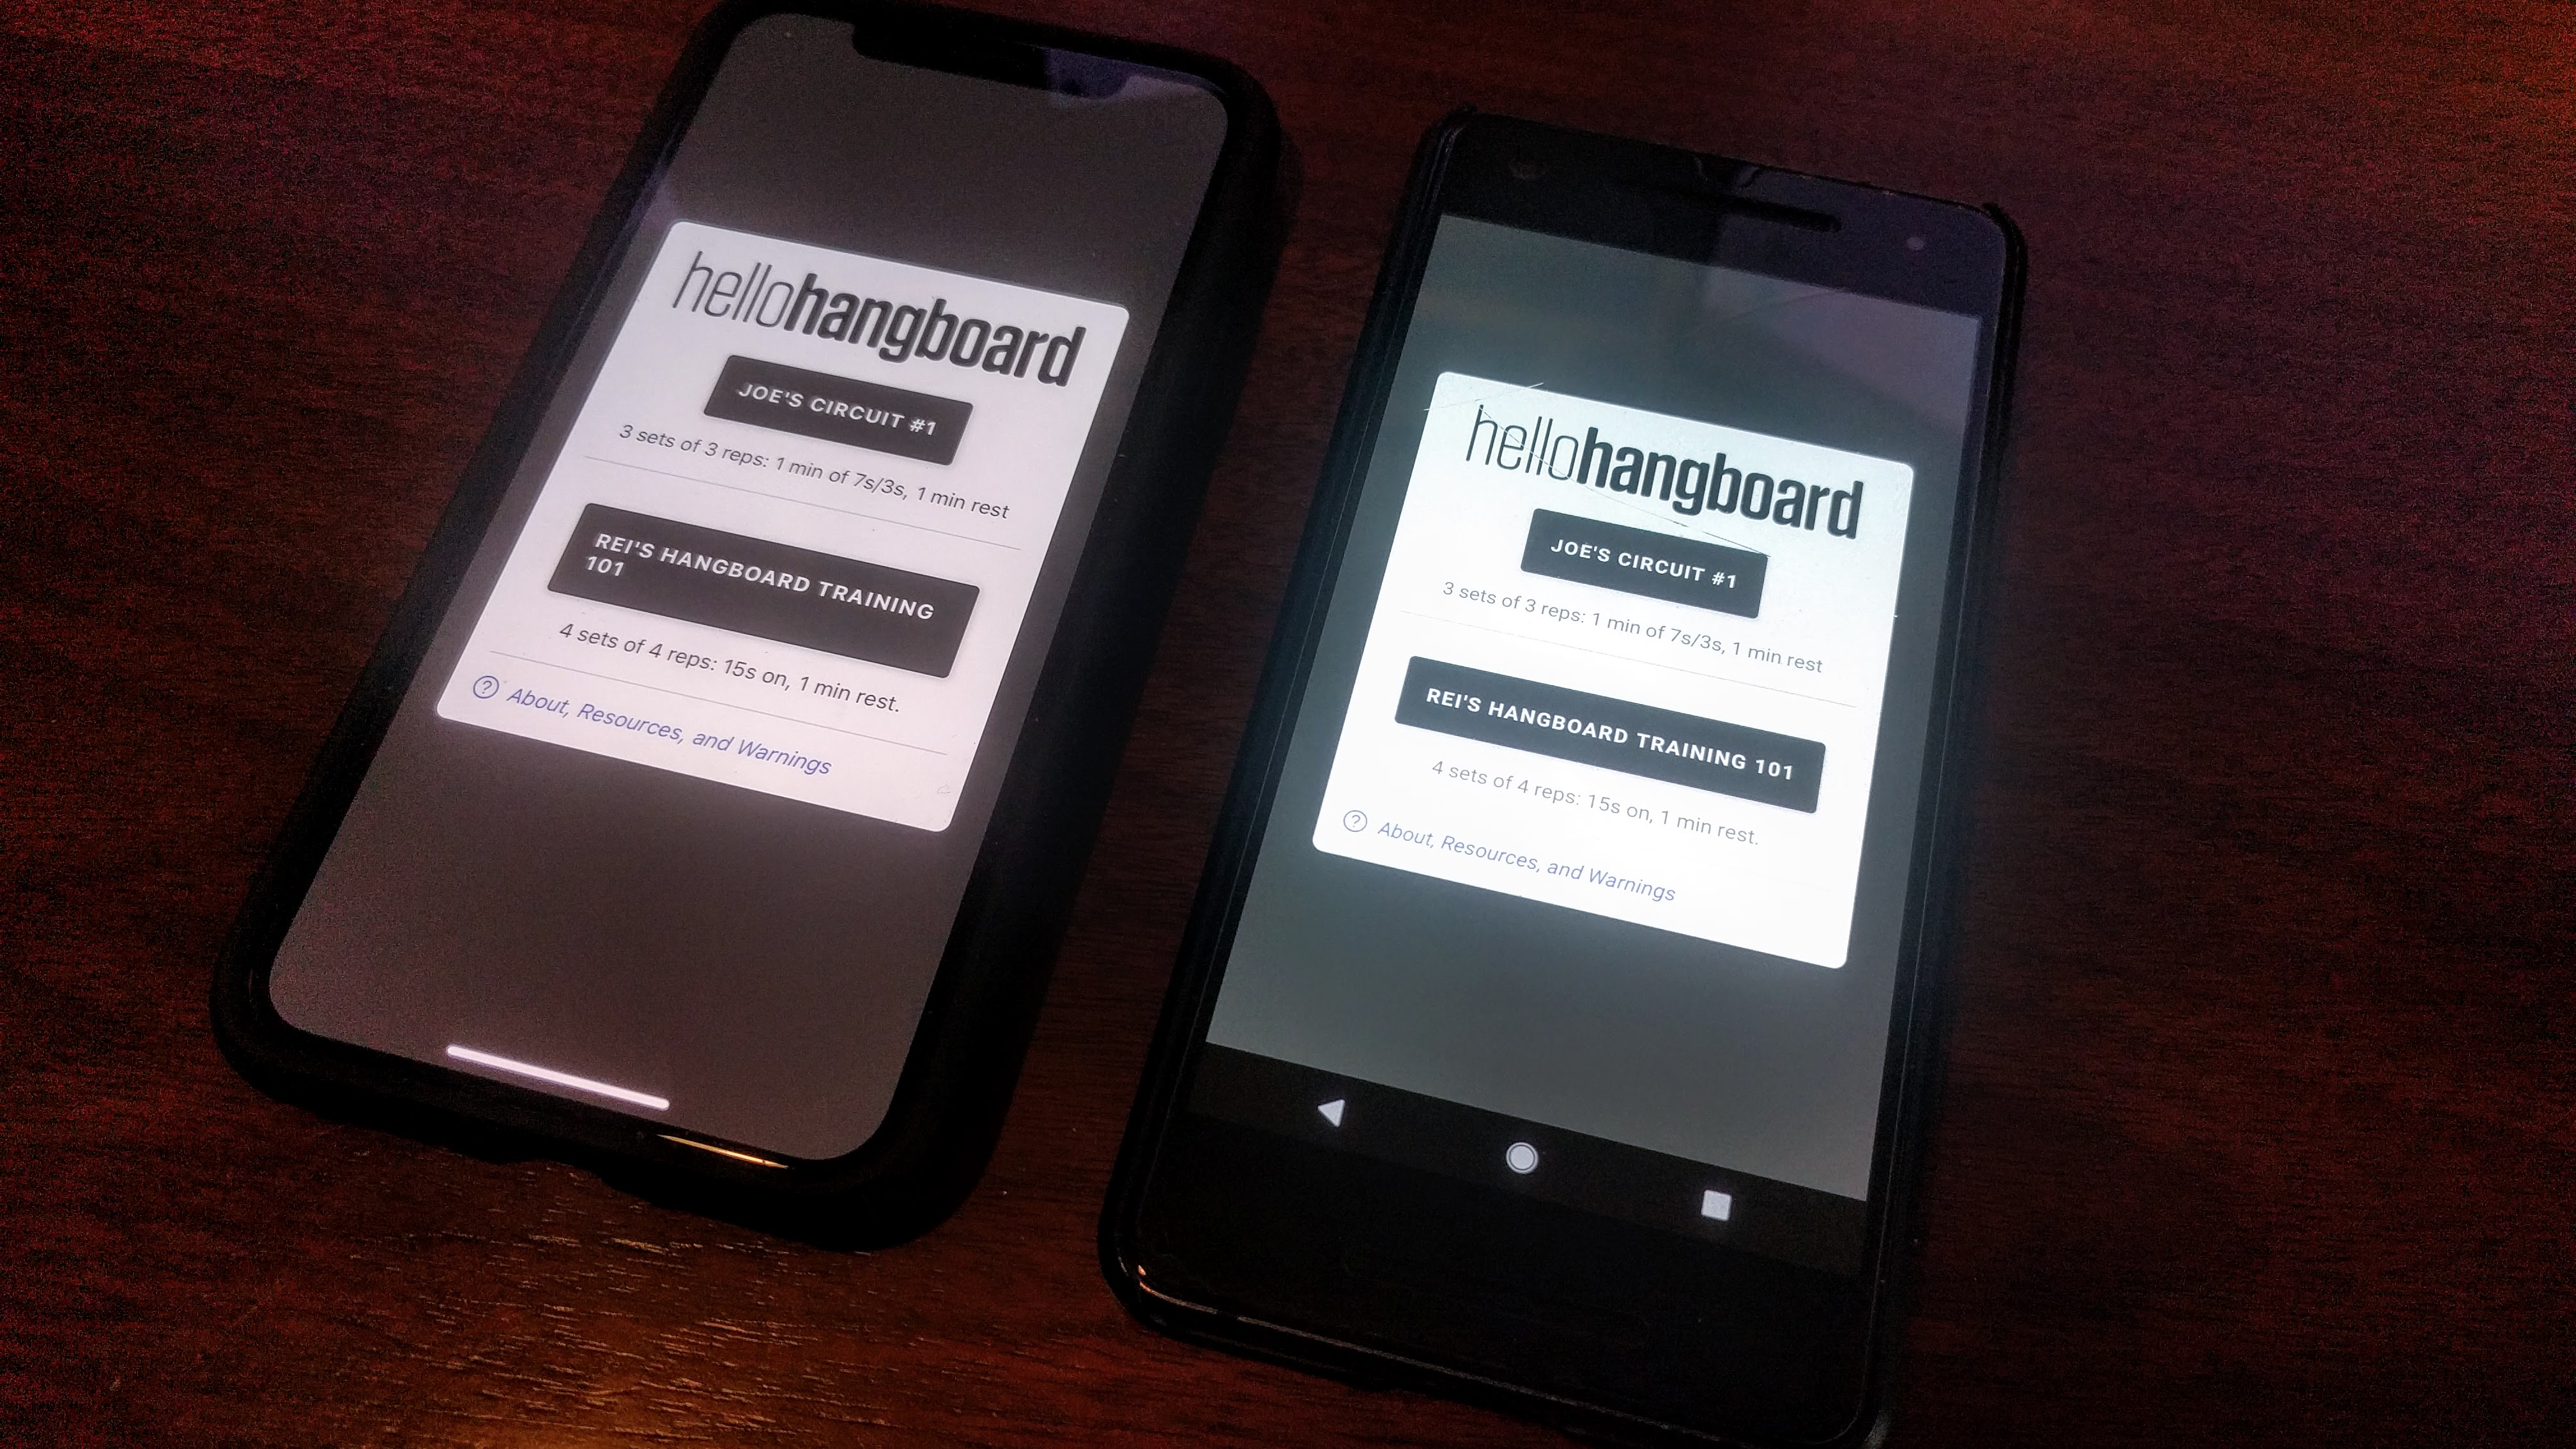
- Usable interval timer for the hangboard for me and friends!
with iPhones (Android friends coming soon, I guess). - First React Native exposure, introduction to how it works, how it builds, and an intro to the nature of its cross-platform abilities.
- First Play Console and App Store Connect process exposure so I can help guide clients through this part of the process.
Things that are needed, in a rough priority order:

- Being able to climb outside again…
- This desperately needs a code review. There are competing examples for how to write ES6 generally and React-specific patterns, even within React Native and Expo’s tutorials. And even with what I already know, I could start to unify it.
- After “is it structured to best practices,” then “is it written properly?” I need to add linting. It compiles but I know but it ain’t pretty.
- Learn more about classes vs functional exports, and why object-oriented class structures seem to have fallen out of style within the JS community just in time for me to start using them.
- A more sustainable way to handle CSS-in-JS than per-component
StyleSheetobjects with no shared attributes. - More circuits and resources — I couldn’t imagine releasing this app publicly in its limited form.
- The visual design
is super utilitarianneeds help.
React Native did get me from “I wonder what it would be like to build a mobile app” to having a compiled app running on both major platforms on physical devices in my hands in record time. I can definitely see why this approach has gained traction so quickly when it’s well-suited. The intimidating part was the number of moving pieces through many levels of abstraction, but the community is active and documentation is evolving quickly to help with that.
Meanwhile, I’ve got my sadistic strength trainer hanging over the stairs and two phones to holler at me to use it every day. That might be it for a while.
Stay healthy, folks. We’ll be back together one day. I’m looking forward to it.